


How To Create Bootable Windows 10/8.1/7 ISO Image From Files/Folders
11:49 PM
Make bootable Windows ISO from installation files
NOTE: This method is applicable to Windows 10, 8.1 and 7 versions.
In this guide, I will show you how you can create a bootable Windows 7/8.1/10 ISO image file from Windows installation files.
Step 1: If all the installation files are in a folder on your PC, you can skip to the next step. And if the files and folders on USB drive, connect the USB flash drive containing Windows installation files to a PC running Windows 7/8/10 and copy all the contents from the USB to a newly created folder on desktop or any other location.


Step 3: Launch IMGBURN. Click on Create image file from files/folders option.

Step 4: In the resulting ImgBurn dialog, click on the small folder icon (see picture) next to the Source box to browse to the folder containing all copied files from the bootable Windows USB. Browse to the folder and then click Select folder.

Step 5: Next, click on the browse icon located next to Destination box to select a location to save the bootable ISO image file that you’re preparing now. Select a location and click Save button.

Step 6: On the right-side, switch to the Advanced tab (see picture) to see four tabs. Here, click on the tab labelled Bootable Disc.
Step 7: Now, select the option labelled Make Image Bootable, select Emulation type as None (custom), and type 8 in the Sectors to load box by removing the existing 4. Note that if you’re preparing a bootable Vista ISO, you need to keep the 4. For Windows 7, Windows 8 and Windows 10, you need to type 8 in the Sectors to load field.

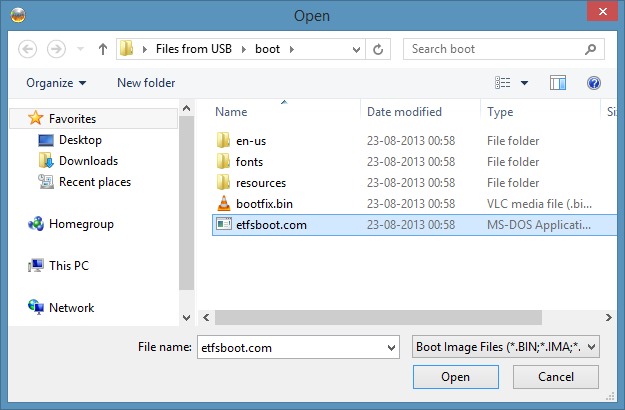
Step 8: Click on the small folder icon next to Boot Image
box (see picture) and then browse to the folder containing Windows
installation files (the folder that contains files copied from the USB),
open Boot folder, select etfsboot.com file, and then click Open button to select etfsboot.com as the boot image file. We are almost done!
 Step 9: Finally, click on the Build
button (see picture) to begin creating your bootable Windows ISO image
file. Upon clicking the Build button, three dialog boxes will appear one
after another. Simply click Yes button when you see the first dialog,
OK button when you see the second, and then, Yes button again when you
see the last dialog.
Step 9: Finally, click on the Build
button (see picture) to begin creating your bootable Windows ISO image
file. Upon clicking the Build button, three dialog boxes will appear one
after another. Simply click Yes button when you see the first dialog,
OK button when you see the second, and then, Yes button again when you
see the last dialog.


Once the bootable ISO image is ready, you’ll see “Operation successfully completed” message.

That’s it! Your can now use the ISO file anywhere to install Windows. How to test an ISO file to check if it’s really bootable guide might also interest you.
Test the ISO file using POWERISO software if it is bootable or not.
Step 1: Download MagicISO software from here and install the same. Note that MagicISO is a paid software but the trial copy is perfectly fine to test the ISO file.Step 2: Launch MagicISO software. Click File menu, click Open and browse to your Windows ISO file and click Open button.
Step 3: Once the ISO file is loaded, you should see Bootable entry in the toolbar of MagicISO if the ISO is bootable (see picture).


0 comments
Thank you for giving me your feedback.