Now, let's create our first bootable UFD using Rufus, shall we? Follow these steps:
1.Rufus
requires an account with admin access in order to make the necessary
changes to hardware. After authenticating, insert the USB flash drive
and launch Rufus. It will detect the drive almost immediately. Since
Rufus can handle various partition schemes and file structures, ensure
that the correct settings are set that match the UFD you're going to
build.
Figure A :
Administrator
2.Click the optical drive button next to the Create a bootable disk using
checkbox, and you'll be prompted to search for the ISO image to use.
Figure B:
Administrator
3.When using ISO images, Rufus will automatically modify the settings to
best match it. Once everything is set correctly, click the Start button
to begin the process. You'll be prompted with a warning that all data on
the UFD will be destroyed. Click OK to proceed with the creation
process.
Figure C :
Administrator
4.Depending on the ISO image size, the process may take several minutes to
complete. For the log readout of each step in the process, click the
Log button to open a side window and save the output details.
Figure D :
Administrator
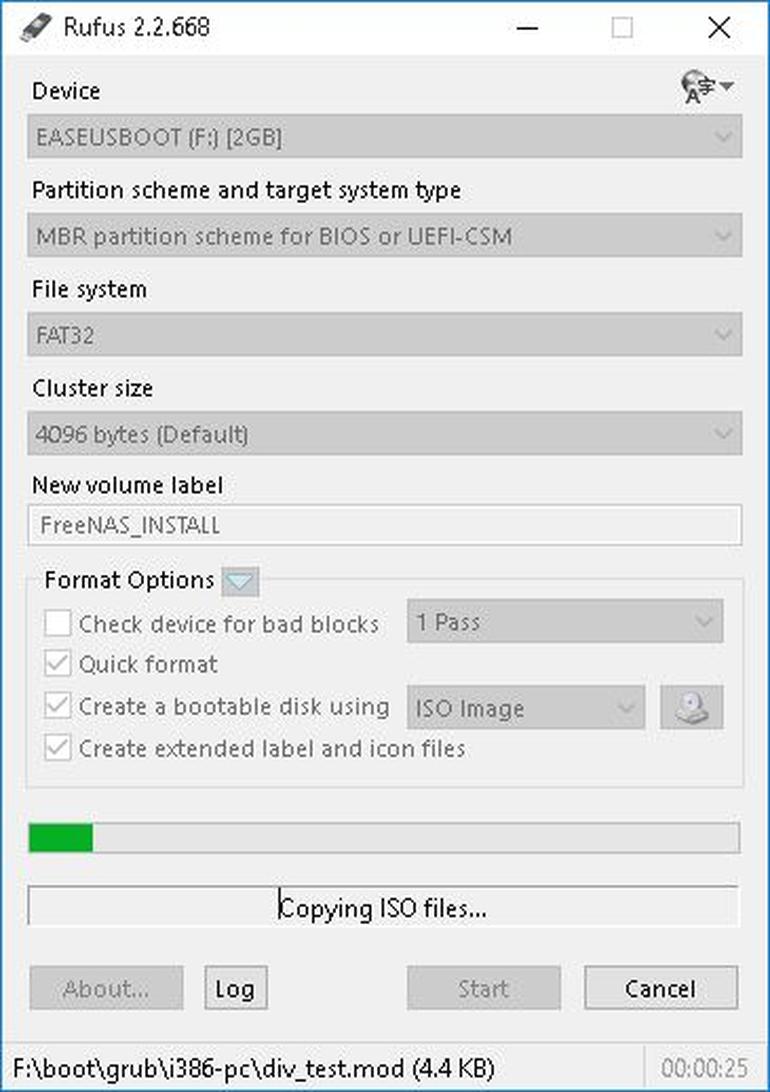
5.The longest part of the entire process is the file copy portion. This is
typically the last step and varies depending on file size/number of
files to copy.
Figure E :
Administrator
6.When complete, double-check the external drive to verify the files were copied over.
Figure F :
Administrator
With
the process completed, simply eject the UFD, insert it into the device
you wish to install the OS on, and boot as you normally would. The days
of carrying multiple CD/DVDs with you and dealing with lagging installs
are drawing to a close with the ubiquitous use of USB drives—and the
storage capacity can't be beat.
There are some links on the site
for some helpful tutorials on creating certain types of UFDs, and
there's multiple localization support for a variety of languages
worldwide.
Also see


 Now, let's create our first bootable UFD using Rufus, shall we? Follow these steps:
 Administrator
 Administrator
 Administrator


 Now, let's create our first bootable UFD using Rufus, shall we? Follow these steps:


0 comments
Thank you for giving me your feedback.